Friday, November 4, 2011

Apple Cinnamon Rolls with Apple Cider Glaze


I love cinnamon rolls, I’ve blogged before about my obsession with Cinnabon Cinnamon Rolls. There aren’t many things better than a cinnamon roll with cup of coffee or for me tea. So, with all these great apples and cider around I decided to play with my cinnamon roll recipe a bit. That’s what baking is all about, right? Taking regular recipes and changing them up to make them even better.

Now, when I am baking with apples I like to use McIntosh, Fuji, Honey Crisp, Golden Delicious and of course Granny Smiths. They are great for baking, because they hold up well when baking and don’t turn to mush. You can use whatever you favorite is, these are mine. Also I combined the idea of sticky buns with the caramel in the bottom of the baking dish. And being that I had a jug of apple cider in the fridge, I used that to make the caramel sauce.


 Cinnamon rolls

1 cup warm milk (110 degrees F/45 degrees C)
2 eggs, room temperature
1/3 cup butter, melted
4 1/2 cups bread flour
1 teas salt
1/2 cup white sugar
1 pkg yeast (1/4 ounce or 2 ½ tsp if you buy in bulk like me)
For the Filling:

1 cup dark brown sugar, packed
2 1/2 tbsp ground cinnamon
1/2 cup butter, softened
2 medium to large apples peeled, cored and diced
For the Glaze:

1 cup of powdered sugar
2 tbsp butter, softened
A splash or 2 of apple cider

Apple Cider Caramel Sauce:

2 cups apple cider
1/2 cup brown sugar
2 tbsp butter
1tsp vanilla

Directions

Dissolve, yeast in warm milk in a large bowl. Add sugar, butter, salt, eggs, and flour. Mix well. Knead dough into a large ball, using your hands dusted lightly with flour otherwise you will be pick dough off your hands for hours. Put in a bowl and let rise in a warm place about 1 hour or until dough has doubled in size. Now here is the great thing about making any kind of dough. If you aren’t ready to use it, go and let out some aggression and punch down the dough. I call it dough therapy. Do this until you are ready to move to the next step.


In a small bowl, combine brown sugar and cinnamon. And peel and chop apples.


Spray work surface, whatever it may be (counter top or grandma’s antique table) with cooking spray or sprinkle flour on it otherwise get out your chisel to get the dried dough up. Roll dough into a 16x21 inch rectangle about 1/4 inch thick. Spread dough with 1/2 cup butter and sprinkle evenly with sugar/cinnamon mixture and pat it down. Then sprinkle on apples.


To make the Apple Cider Caramel Sauce; put apple cider in a saucepan, and bring to a boil. Continue to cook until reduced by about half. Add sugar, butter and vanilla. Then cook until thicken. Let cool and pour in the bottom of baking dish.


Roll up dough and cut into 12 rolls (or smaller rolls). Place rolls in 9x13 inch glass baking dish with caramel sauce. Cover and let rise until nearly doubled. This should take about 30 minutes. 
                            

Meanwhile, pre heat oven to 350 degrees. Bake rolls in pre heated oven until golden brown, about 20–30 minutes.


While cinnamon rolls are in the oven make the glaze. Mix butter and powdered sugar together, and then add apple cider until you get a nice yummy glaze. When the cinnamon rolls come out of the oven, drizzle the glaze over the rolls. Be blessed and enjoy.

Come join the fun at the My Baking Addiction and GoodLife Eats Holiday Recipe Swap sponsored by Red Star Yeast.

Friday, October 28, 2011

Finding Your Strength After Losing a Child


I have debated all month whether or not to write this post. I am a food blogger, but I am also a mom and don't really talk about my children that much. That changes today, it is National Pregnancy and Infant Loss Month and I am sharing my story for the Million Moms Challenge.

Today is a very bittersweet day for me; on one hand it is my brother's birthday and on the other it is the day I lost my son Dominic. While I no longer mourn his passing; I celebrate the life and time I had with him. He had such an impact on everyone he came in contact with. He suffered with really severe eczema; so bad to the point where he would scratch until he was bleeding. He was the sweetest little boy you would love to meet.

The day he passed was much any other day. He had been fighting a little stomach bug and was laying down to take a nap, and being I was up all night with him and 5 months pregnant I decided to take a nap as well. Little did I know that would be the last time I would see him alive. I ran through all the "what-ifs" and "if I only just" thoughts, and I realized that what happened was beyond my control. Then I had to make a choice, do I let grief take over my life and not take care if myself and my family. Or honor him through my actions and by helping others.

Many people have said to me and my husband that they don't know if they could have survived losing a child; and I tell them if you have faith in God and believe in his word you can get through anything. I wasn't going to let the devil use this situation to rob me of my relationship with God. If anything it pulled me closer to him; all my strength comes from Him. I chose to live my life as a testimony to God's love and help other mom's who have lost a child. I recently saw the movie Courageous and the Pastor said that surviving after losing a loved one is like living with an amputation. You will never feel complete again, but learn to adapt and keep going. I think about my little boy everyday, but I will continue to honor him by serving others. If my story helps just one person cope with a lose then it will all be worth it. Be blessed and remember to cherish your children.

Sunday, September 25, 2011

Pepperoni Pizza Quesadilla with a Cheesy Marinara Dipping Sauce


So school is in full swing now, and there are lunches to be made. My son is the PB&J Prince; he could probably eat it for breakfast, lunch and dinner. But I refuse to get stuck in that rut this year, plus a kid in his class has a severe allergy to nuts so they have asked us parents to not send any nut products to school. I know, the nerve of them, but rather than have my son be responsible for hurting a classmate I have been trying to get creative with his lunch ideas.

So I decided to take 2 of his other favorite meals and combine them; pizza and quesadillas. I was looking for different ways to make his lunch more fun, and this is an idea I thought he would enjoy. I was so happy that he enjoyed his quesadilla, and that makes it so worth it. The idea of quesadillas is such a flexible option for kids, you can put anything between 2 tortillas with some cheese and some meat, and you have an instant hit. Plus they are quick, in the time it takes to make a sandwich you can make this for your family.

Pizza Quesadilla with a Cheesy Marinara Dipping Sauce

2 Whole Wheat Flour Tortillas
Shredded Mozzarella Cheese (the amount depends on how cheesy you like it. I used about 1/4 – 1/2 cup.)
Turkey Pepperoni
Italian Seasoning

Cheesy Marinara Sauce
1/4 cup crushed tomato sauce
1 tsp Italian seasoning
1/2 tsp garlic powder
1/2 tsp onion powder
2 tbsp shredded mozzarella

Place a non stick skillet over medium to medium high heat and spray with cooking spray (I use olive oil spray).
Put one tortilla in skillet. Once warmed add cheese.


When cheese starts to melt add pepperoni and season with a little Italian seasoning.


Place second tortilla on top and flip. Once the other side of the tortilla is browned, remove from pan and cut into 4 wedges.


For the Marinara Sauce, in a sauce pan add crushed tomatoes (Note: you only need a ¼ cup of sauce. You can put the remainder of the sauce in a Ziploc bag and freeze until you need to use it.).
Then add your spices and cheese.
Once cheese starts to melt stir to incorporate, and put in storage container for the kids lunchbox.


This is a great easy recipe to change up your kid’s lunch and get them out of the PB&J rut. If you need any more lunch ideas head over to http://www.familyfreshcooking.com, and check out her Project Lunch Box.
Hope this show you that it is very easy to prepare a great healthy lunch for your kids. Be blessed and enjoy.


Wednesday, September 7, 2011

Turkey and Black Bean Chili


It is September and fall is upon us, my favorite time of year. It’s full of warm comfort food, sweaters, apples, pumpkin and chili. During the chilly autumn days there is nothing like curling up on the couch with a big comfy sweater with a big bowl of chili and a good movie (that is a perfect Saturday to me). I love chili, it’s so warm and inviting; meat, beans tomatoes and just a little spicy. Now I know there is a big debate over beans in chili; in Texas I know it’s a big no-no, but I like so I use beans. Cooking is your personal preference, so do what you like.

I normally use ground beef for my chili, but since I have been eating a lot of beef and steak over the summer I decided to use ground turkey. You know lighten it up a little bit, and we normally always have it in the freezer. And I used black beans, which are better for you then some of the other beans. Plus they work nicely with the turkey.


Turkey and Black Bean Chili
1lb ground turkey
1 package of Chili Seasoning (with 1lb of meat use only half the pack)
1tsp chili powder
1tsp garlic powder
1tsp onion powder
1tsp ground cumin
½ tsp crushed red pepper flakes
1 can of black beans (do not drain)
1 can of diced fire roasted tomatoes
½c water

In a large pot or dutch oven brown off your ground turkey over medium heat.
Add spices and cook off some of the rawness of the spices.
Then add the black beans, tomatoes and water.
Bring to a boil and then turn to low and let it simmer for about ten minutes.


When I made chili I have to have corn bread. I love the Honey Cornbread Recipe from FoodNetwork.com.


This chili recipe is such a great meal to have as the weather starts to cool off to warm you up. Be blessed and enjoy.

Friday, September 2, 2011

S'mores Blondies


I have always been a fan of s’mores, ever since my 1 year as a Girl Scout. I mean what’s not to love its marshmallows (gooey, melted and yummy), chocolate (enough said) and graham crackers. I had an addiction to graham crackers with I was pregnant with the youngest; I could eat a whole box if my oldest wasn’t asking for some too. So I decided to combine a blondie and s’mores; and let me just say they are a match made in heaven. They were chewy like a blondie, but still had the graham cracker taste. Then combine that with the chucks of dark chocolate (my fav) and toasty marshmallow just makes them that much better.
So I went on a search of recipes that used graham crackers in a blondie recipe and just gave it my own little twist. I think that is one of my favorite things about baking and cooking in general, that once you know the basics and rules you can mix it up and make it your own. So, since September is here and summer is quickly coming to an end; I decided to whip up a batch of these blondies to hold to summer a little longer. Plus, the s’mores blondies can be enjoyed year round when you want a little summer fix in the middle of winter.


S’mores Blondies (adapted from the Male Baker Graham Cracker Blondie)

2 1/3 c Flour
1 1/2 tsp Baking Powder
1 tsp Salt
¾ c Graham Cracker crumbs
14 tsp Unsalted Butter, softened
1 ¾ c Brown Sugar
3 Large Eggs
2 tsp Vanilla extract
1 4oz bar of dark chocolate, broken into chunks (I used Ghirardelli 60% dark, but use your favorite kind)
1 cup Mini Marshmallows, divided

Preheat oven to 350 degrees and line a 9 x 13 pan with parchment and spray with non-stick baking spray.
Combine flour, graham cracker crumbs, baking soda, and salt in a bowl and set aside.
In a bowl of mixer, cream butter and sugar; then add eggs one at a time and vanilla.
Add the flour in two parts and mix until combined.
Fold in the chocolate chunks and half of the marshmallows and pour into pan.
Sprinkle remaining marshmallows over the top (note: the marshmallows will expand in the oven, it is ok.)
Bake for 35-40 minutes or until toothpick comes out clean.
Cool for 20 minutes, if you can. Enjoy.


These are a great treat for kids and adults alike. You can have one for dessert or even send one off to school with your kids, but you might not be able to eat just one. Be blessed and enjoy S’more.


Saturday, July 23, 2011

Anniversary Cake


I know I haven’t posted anything in a while, not that I haven’t been baking or cooking. I just have been busy trying to keep the little ones entertained during the summer. And today I have something special to share; I made my first anniversary cake. I’ve done sheet cakes and cupcake cakes before, but nothing where I really got to get fancy with, so I was excited and nervous to do this.
I was asked to make a double heart anniversary cake; half marble half red velvet cake with fresh strawberry and banana filling and Italian meringue buttercream.  A tall order I know, but I was excited for the challenge. First, let me just say that I am in love with Italian Meringue Buttercream. I had a little mini heart attack making it; I thought it wasn’t going to come together when I started adding the butter and it turned to a soupy mess. But with a little prayer and patience it turned to the yummiest, pillowy (not a real word, but so) soft icing. Now when you start adding the butter put a clean towel over the mixer to avoid the mess I made in the kitchen. Yeah, soupy buttercream everywhere is not fun to clean up.

Red Velvet Cake
Baked: New Frontiers in Baking by Matt Lewis and Renato Poliafito

1/4 cup dark unsweetened cocoa powder
2 tablespoons red gel food coloring (see note below)
1/4 cup boiling water
6 tablespoons unsalted butter, softened, cut into small pieces
2 tablespoons vegetable shortening, at room temperature
1 2/3 cups sugar
3 large eggs
1 cup buttermilk
1 teaspoon pure vanilla extract
2 1/2 cups cake flour
1 teaspoon fine salt
1 tablespoon cider vinegar
1 teaspoon baking soda

1. Preheat the oven to 325 degrees F. Butter two 12-inch heart cake pans, line the bottoms with parchment paper, and butter the parchment. Dust with flour, and knock out the excess flour.
2. In a medium bowl, whisk together the cocoa powder, food coloring, and boiling water. Set aside to cool. In the bowl of an electric mixer fitted with the paddle attachment, cream the butter and shortening until smooth. Scrape down the bowl and add the sugar. Beat until the mixture is light and fluffy, about 5 minutes. Add the eggs, one at a time, beating well after each addition.
3. Stir the buttermilk and vanilla into the cooled cocoa mixture. Sift the flour and salt together into another medium bowl. With the mixer on low, add the flour mixture, alternating with the cocoa mixture, to the egg mixture in three separate additions, beginning and ending with the flour mixture. Beat until incorporated. In a small bowl, combine the vinegar and baking soda and stir until the baking soda dissolves; the mixture will fizz (yeah, I didn’t read all the directions and adding the baking soda to the dry ingredients and just added the vinegar and it worked out fine). Add to the batter and stir until just combined.
4. Divide the batter among the prepared pans and smooth the tops. Bake until a toothpick inserted in the center of each cake comes out clean, about 20 minutes, rotating the pans halfway through the baking time. Transfer the cakes to a wire rack and let cool for 20 minutes. Invert the cakes onto the rack, remove the pans, and let cool completely. Remove the parchment.

Marble Cake
Basic Yellow Cake
(Found recipe on Cheftalk.com, but didn’t follow the directions. I didn’t like the texture, so I used a traditional method and it came out much better)
2 1/4 cups un-sifted all-purpose flour
1 1/2 cups granulated sugar
3 1/2 teaspoons baking powder
1-teaspoon salt
1 1/4 cups milk
Vegetable oil
1 stick butter, softened
1-tablespoon vanilla extract
3 large eggs
2 ounces of bittersweet chocolate melted and cooled

Preheat oven to 350°
Cut wax paper to fit the bottom of (2) 12-inch heart pans. Spray the pans with cooking spray, place the wax paper in the pans and spray the paper.
In a large mixing bowl combine the flour, sugar, baking powder and salt, mixing well.
Measure the 1-1/4 cups of milk in a 2 cup measuring cup….then add enough vegetable oil to bring the liquid up to 1-1/3 cups.
Cream butter and sugar until light and fluffy. Add eggs one at a time until well blended. Then with mixer on low add flour in 3 additions switching and adding the milk mixture.
Take 1 cup of cake batter and blend with cooled chocolate. Divide yellow cake batter in 2 pans, then with a spoon place mounds of chocolate batter in pans. Now with a knife swirl to create marbled effect.
Bake at 350° for 15-17 minutes or until a wooden pick inserted near center of cake comes out clean, or until cake springs back when touched lightly in the center.

Taken with my cell phone.


Italian Meringue Buttercream
Adapted from Cake Journal
1/2 cup of cold water
2 1/4 cups of caster sugar (I used regular Sugar)
1 cup of egg whites (10)
1 1/2 pound of soft unsalted butter
1 tsp of vanilla extract
Kitchen stand mixer

First set the timer on 7 mins & pour the egg whites into the kitchen mixer with whisk attachment.

Step 1:
Place sugar & water in a sauce pan and bring it to the boil and start the timer. Boil it on medium high temperature.
Step 2:
When the sugar syrup has been boiling for 5 minutes, start the kitchen mixer on full speed and whisk the egg whites for the last 2 minutes. When the timer is up the sugar syrup is done. With the mixer still going on high speed slowly pour the hot syrup down the side of the mixing bowl. Discard any leftover syrup. Be very careful not to get burned on the hot syrup.
Step 3:
When all sugar syrup has been added it should look thick and fluffy. Stop the mixer and change for the paddle attachment. To avoid meringue splatter all over your kitchen place a clean tea towel over the mixer (Remember this part avoid the mess). Set the timer on 10 minutes and beat on high speed. This is how long it takes in my mixer for the mixing bowl to be cool to the touch.
After 10 minutes you should now have a lovely thick meringue.
Step 4:
Now it’s time to add the butter; Start the mixer on high speed and with a knife cut pieces of the butter then add it to the meringue. When all butter is added it will not take long for mixture to turn into nice thick smooth buttercream. When that happens slow down the mixer and add 1 tsp of vanilla extract. Stop the mixer and scrape down the bowl and start again. I do this two times. You should now have a bowl full of lovely Italian meringue buttercream.


Note: If the IMBC won’t combine just continue to whip, whip, whip. It will eventually get smooth. If you are still having problems, put the whole bowl with paddle attachment into the fridge and let it “cool” down a bit and then whip it again (prayer and patience).
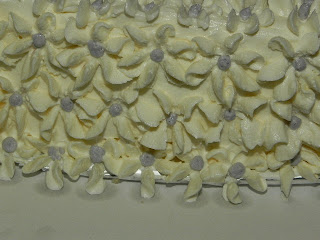
Start of some of the detailing.

The finished flower detail.

Happy Anniversary!
Be blessed and enjoy!

Wednesday, June 29, 2011

Potato Salad a Cookout Staple


Summer is in full swing now, kids are out of school and grills have been fired up once or twice. Now, with the biggest barbeque holiday of the year right around the corner; what’s on your 4th of July Menu? Hopefully after this post you will give my potato salad recipe a try. What cookout is complete without this wonderful side dish, and everyone has their own special trick to make it just right. So here are my tricks to help you make the best potato salad.  
First, make sure you salt the water when cooking your potatoes. Just like when cooking pasta or rice, because it’s hard to season it afterwards. I like to boil my eggs as the potatoes, this way they are cooked perfectly. This next tip is from my Nana, take the hard boiled eggs and one onion coarsely chopped and puree in food processor. This will ensure that no one bites down on big chunks of egg or onion and gives the potato salad a nice creamy texture. With these tips potato should be great.

Potato Salad
3lbs Yukon gold potatoes
4 eggs
1 medium onion (coarsely chopped)
1 cup mayo (more can be added to get desired creaminess)
½ cup sweet relish
1 tbsp yellow mustard

Peel and dice potatoes (try to make sure potatoes are the same size to ensure even cooking), place in a large pot and cover with cold water (be sure to salt the water).
Add eggs.
Boil potatoes until are tender (test with fork).
Drain potatoes and spread on cookie sheet to cool. If you take your potatoes too far, put in fridge to cool and they will be fine. I skipped this step the first time I made potato salad and ended up with potato soup.
While potatoes are cooling remove shell from eggs and place in food processor with chopped onion. Pulse until pureed, about 8-10 times.
Once potatoes are cooled place in a large bowl with egg and onion puree.
Add relish and mayo. Then add mustard to give that great yellow color.


I hope you try my Nana’s potato salad at your next cookout. Be blessed and enjoy.

Saturday, June 11, 2011

How to Dress Up Store Brought Brownie Mix


Peanut Butter Cup Brownies


I am a big fan a brownies; fudgy, chewy, chocolaty and yummy brownies. I don't always get to make them from scratch. Sometimes I don't feel like chopping all the chocolate and the whole double boiling thing. I just want the instant satisfaction of a box mix (yeah, I know that's lazy but lazy can be good too). But that can be boring, so I like to dress them up to make them a little more homemade. You can use any box mix you like, just add a few simple ingredients to make it your own.


Chopped Snickers

Add to Brownie Mix

Substitute Coffee or Espresso for Water 

Add chopped Peanut Butter Cups


I like the combo of chocolate and coffee, so I like to add a teaspoon of coffee or espresso powder to the water in the recipe. Then, follow the rest of the recipe according to the package instructions. with adding the mix ins you will need to increase the oven temp to 350 and bake for about 45-55 minutes. Then mix is whatever you want, I did one batch of chopped up Snickers (my favorite) and one with chopped up peanut butter cups (my hubby's favorite). With this the possibilities are endless; and you can wow all the parents at the next school bake sale or class party with some brownies chopped up chocolate chip cookies in it (ooh, I think I might try that next).


Snicker's Brownies


I hope you get in the kitchen and experiment with your own mix in brownies. Be blessed and enjoy.


 What is your favorite thing to mix in your brownies?

Thursday, June 2, 2011

Chicken Scampi Pasta


Like every other mom out there I love it when I find quick, easy dishes to prepare for the family. And this is one of my family's favorites, Chicken Scampi Pasta. We are a pasta loving family around here; we have it at least once a week in some form.

This Scampi is really simple to make and full of flavor too; you can easily swap out the chicken for shrimp and make it a date night meal. I have even thrown in some spinach to sneak some veggies into the kids. That's one of the things I love about pasta dishes, you can throw pretty much anything together with it and will be good.


Chicken Scampi Pasta


1lb chicken tenderloin (you can also use breast, but tenderloins are usually less expensive)

1 tsp italian seasoning

1tsp dried oregano

2 tsp garlic powder

1 tsp lemon pepper

½ tsp red pepper flakes

1 tsp salt

½ tsp pepper

1 stick of butter, divided in half

2 tbsp of extra virgin olive oil

4 cloves of garlic, minced

1 large or 2 small lemons

2tbsp parsley fresh or dried

1lb of your favorite pasta (I used spaghetti)


Cook pasta according to package instructions.


While pasta is cooking dice chicken tenderloins into small chunks, and season with spices.


Place butter and olive oil in a pan over medium high heat. When butter has melted add chicken and sauté until brown.


Add the remaining butter and garlic and cook until fragrant. Slice the lemons and squeeze cut side up in the pan.


Drain pasta reserving about ½ cup of pasta liquid. Add some of the pasta water to loosen sauce.


Place drained pasta in serving bowl and add chicken. Sprinkle with parsley and cheese (if you like).


I hope you enjoy my version of chicken scampi as much as my family does. Be blessed and enjoy.


Wednesday, June 1, 2011

Banana Crumb Muffins


I love muffins; they are a great little handheld breakfast. You can grab them and head out the door with your coffee or tea, and who doesn't like the idea of an easy breakfast. Bananas on the other hand I have not always been a fan of, but in muffin form they are so good. And when you add a crumb topping things get so much better.

These banana muffins are quick to whip up and leave your house smelling so good. If you ever plan on selling your house, have some of these baking and it will surely get you a good price. This particular recipe makes quite a large amount of muffins; 3 dozen muffins or 2 dozen and a loaf of bread. They freeze really well so you can have some for when guest stop by or if you want to send some to a friend.


Banana Crumb Muffins
Adapted from Designs by Kristen Ann


2 cups brown sugar

1 cup butter

4 eggs

3 1/2 cups flour

2 tsp baking soda

5 mashed bananas (with cinnamon and nutmeg)


Streusel Topping

½ cup butter

1 cup brown sugar

1 cup flour

1 tsp cinnamon

Cream together sugar and butter. Add eggs, mix well, and make sure to scrap the bottom of the bowl. Add flour, and baking soda, mix until combined. Then add bananas. Set this mixture aside.


For the streusel topping, cream butter and sugar together (the butter should be very soft). Add flour and combine completely, the mixture should look like a crumble. You want to have some texture to the streusel, so with your hands you can clump it together while mixing. Add just over half the streusel to the muffin mixture and lightly fold in. There should be waves of streusel in the mixture, you do not want to over mix this!!


Scoop the muffin mixture into the liners, going about 2/3 up. This recipe should make about 3 dozen muffins. Sprinkle the remaining streusel on top of the muffins generously. You can pat it down slightly to make sure it sticks. Bake at 350 for about 18 minutes.


These are a really great way to get some fruit in to your kids without them knowing. My kids love them and I hope yours do to. Be blessed and enjoy.


Links to:
Sweet for Saturday @Sweet as Sugar Cookies

Friday, May 13, 2011

Apple Hand Pies


I will admit that I sometimes make a run through a certain fast food chain for a 2 for $1 apple pie. And I may or may not share with my little crumb snatchers (mostly share, cause since becoming mommy I never enjoy my meal without sharing); they are just so good. Now I always have apples in my fridge, and I had some puff pastry sheets in the freezer so I decided to make my own little version myself. This is a quick, easy way to satisfy that apple pie craving but be careful they are addictive. I first got the idea from Purple Foodie, and just had to give it a try.
I used a combo of Granny Smith, Golden Delicious and Gala; I also used my favorite puff pastry sheets that I use for empanadas.  You can certainly use your favorite pie dough if you want to go the fully homemade route; I just chose not to this time. I think this is the simplest apple pie recipe around.

Apple Hand Pies
3 medium sized apples, cored and diced (I used Granny Smith, Golden Delicious and Gala)
2 packs puff pastry rounds (I used Goya puff pastry for turnovers)
2 tbsp butter
3 tbsp of dark brown sugar
1 tsp cinnamon
½ tsp nutmeg
¼ tsp cloves
1 tsp corn starch
¼ cup apple juice
Pinch of salt

Preheat oven to 400 degrees. Spray sheet pan with nonstick spray.
In a bowl combine apple, brown sugar, cinnamon, nutmeg, cloves, corn starch and salt.
In a pan sauté apple mixture in butter until it starts to soften.
Add apple juice, and boil until sauce starts to thicken.
Remove from heat and let cool.
Lay out puff pastry round on a lightly floured surface.
Place a tablespoon of filling near center of pastry.
Moisten the edge of pastry with water and fold over to seal with fork (or fold over to give decorative edge).
Place on sheet pan and with a knife cut a few slits in tops to let out steam.
With a pastry brush, brush the tops with some of the sauce the apple are in.
Bake for 10-15 minutes or until pastry is golden brown. Makes about 24 hand pies.


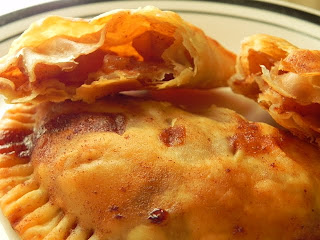
These little hand pies were a nice little ode to the fast food kind, and just as addictive. I hope you try them soon, be blessed and enjoy.

Friday, May 6, 2011

Peanut Butter Cookies stuffed with Mini Peanut Butter Cups


I know you are probably thinking man that is a long title, but they are the simplest cookies. And they have a little surprise in the middle. Peanut butter cookies are in the top 10 of All time favorite cookies (true fact, I looked it up). I love a good, soft chewy peanut butter cookie with the fork marks on them and sprinkled in sugar. They bring me back to my aunt’s kitchen, making cookies and watching the Miss America pageants in my pj’s.
The peanut butter cookies use the same cookie base; they just have a little mini peanut butter cup in the center. Have you seen the new Reese’s Mini peanut butter cups? They are just too cute and dangerous to have in the house. You can throw back like 8 of them before you know what you’re doing.  Trust me; I got through almost half the bag before I remember they were for the cookies. So, just to be on the safe side get 2 bags; one for you and one for baking.

Peanut Butter Cookies
1 cup dark brown sugar
½ cup butter, soften
½ cup peanut butter (I used Smucker’s All Natural Chunky)
1 egg
1 ½ cups of All- Purpose Flour
1 tsp vanilla
½ tsp baking soda
½ tsp baking powder
½ tsp salt
20-24 mini peanut butter cups

Preheat oven to 375 degrees.

Combine flour, baking soda, baking powder and salt and set aside.

In your stand mixer fitted with a paddle attachment beat butter, brown sugar and peanut butter on medium speed.

Add egg and vanilla.

Reduce speed to low and add flour mixture.

Using a small cookie scoop; scoop some of the cookie dough.

Make a small pocket and place one mini peanut butter cup in the center.


Then fold dough to cover the cup. The recipe makes 20-24 cookies depending on the size of your scoops.


Bake 8-1o minutes or until edges or lightly browned.


I hope you enjoy these as much as my family did, because they are all gone. Be blessed and enjoy.

Thursday, May 5, 2011

Pinho's Bakery- My First Job

As you all know I love baking, that's what my blog is about after all (with a little cooking thrown in). So you shouldn't be too surprised that my first job was at a bakery. It wasn't a job that I went looking for, I got it quite by accident. I would make my to the bakery EVERYDAY after school and get lunch (because school lunch was gross).

 One morning I went in with my dad to get some doughnuts for my mom's salon, and Julie (the owner) told my dad that when I was old enough I was going to work for her. A few weeks later after my 14th birthday I was a Pinho's girl (that's what they called us at school). I loved it there; I got to make my own money, buy my own school clothes, and best of all sample all the yummy goodness of Pinho's. Pinho's is a Portuguese bakery, and allowed me to learn to appreciate all kinds of pastries and bread.

That is definitely where I started to love baking and food in general. I worked there for 2 years until my mom moved to Virginia. But, every time I get to go back I always make my way their to see Julie and the family. I miss them so much that for my first born's baby shower I had a Julie make my shower cake, and my BFF brought it down. Now that is some serious love. So if you are ever in the Northern New Jersey area, stop in Roselle and go to Pinho's Bakery . You won't be sorry you did. Be blessed.

Snickerdoodle Blondies


I love Snickerdoodle cookies-- buttery cookie rolled in cinnamon sugar. What’s not to love? But sometimes I’m not in a cookie mood. I am a big fan of blondies also. You know the underappreciated cousin of brownies. They are moist, chewy little brownie wannabes (minus the chocolate); and know I took them to another level by using my favorite little secret weapon Brown Butter. Brown butter is a little reduction I call blessed. I am finding ways to incorporate this into all of my baking recipes and even some savory ones. It is nutty and has a more concentrated butter flavor, that for me is just all in all goodness.
 Ok, Back to the blondies; and the Snickerdoodles.
Snickerdoodle blondies (just add brown butter and cinnamon sugar).
I have found recipes that use melted butter or just softened butter, but the brown butter keeps the blondie really moist. Just like with any good base you can add different things to it like chocolate chips, nuts, or anything you can think of and it will be good. The recipe isn’t too difficult and brings big flavor. When I made these blondies the first time my husband took a bite and knew he had to have another. They are addictive and don’t usually last too long in my house.

Snickerdoodle Blondies
Adapted from Martha Stewart

1 1/4 cups (2 1/2 sticks) unsalted butter
2 1/4 cups all-purpose flour
1 1/2 teaspoons baking powder
1 1/2 teaspoons salt
2 cups packed dark-brown sugar
1/2 cup granulated sugar
1/2 tsp cinnamon
Pinch of nutmeg
3 large eggs
2 1/2 teaspoons pure vanilla extract
2 tsp sugar
1 tsp cinnamon
Pinch of nutmeg

Directions

Preheat oven to 350 degrees. Spray a 9-by-13-inch baking pan with non-stick spray.

In a saucepan over medium heat, cook the butter until it turns golden brown; remove from heat, and let cool. Check out my Wordless Wednesday Post for more instructions.

Whisk together flour, baking powder, and salt.

In the bowl of an electric mixer, combine browned butter and both sugars; stir with a wooden spoon until combined. Attach bowl to mixer; add eggs.

Then using the paddle attachment, beat on medium-high speed until light and fluffy, about 3 minutes.

Add vanilla, and beat to combine.

Add flour mixture.

 Mix until thoroughly combined, and pour into prepared pan. Sprinkle with cinnamon sugar mixture.

Bake until a toothpick inserted in the center comes out clean; 35 to 40 minutes. Transfer to a wire rack to cool completely before turning out of pan onto a cutting board.


I hope you love Snickerdoodle Blondies as much as I do. Be blessed and enjoy!

Tuesday, May 3, 2011

Wordless Wednesday- Brown Butter

Place butter for recipe in pan over medium heat.

Stir butter with wooden spoon while melting.


Butter will start to develop brown bits at the bottom. This is the goodness.
Here is the final product. You can use this in plenty recipes from cookies to banana bread.

Be blessed and enjoy!

Wednesday, April 27, 2011

Wordless Wednesday-Chocolate Rice Cereal Snacks

Materials Needed

Spray pan to prevent sticking.

Melt butter and marshmallows.

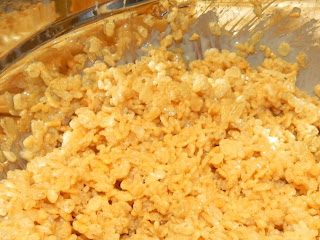
Add Rice cereal.

Add a mix of chocolate.

Mix to combine.

Spread into pan.

Cover with parchment paper.

Press down with another pan.

Remove from pan and cut into squares.

Be Blessed and enjoy.
Related Posts Plugin for WordPress, Blogger...